


When a kids’ electric dirt bike will not start, the safest response is a calm, ordered inspection—not repeated throttle twisting, random charger swapping, or opening electrical components. Many no-start situations come from a simple interlock, incomplete connection, low battery, or control position. Others indicate damage that should be handled by qualified support.
This guide helps parents separate “the display is completely dead,” “the bike powers on but will not move,” “the motor cuts out,” and “the battery will not charge.” Always follow the model-specific manual. Power the bike off before touching connectors or moving parts, remove the key if equipped, and keep the child away during troubleshooting.
First describe the exact symptom
“It does not work” is not enough information. Note whether the display or indicator turns on, whether lights work, whether the battery shows charge, whether the motor makes any sound, and whether the failure began at startup or during a ride. Record recent events such as charging, washing, a fall, storage, rain, mud, or transportation.
A short video of the display, warning code, sound, and control positions can help customer support. Do not ask a child to reproduce a dangerous failure while filming. If the bike smells burnt, becomes unusually hot, has a swollen battery, shows melted wiring, or has crash damage near the battery, stop immediately and move it away from combustible materials according to the manual.
Use a safe troubleshooting order
Begin with external checks that do not require disassembly. Confirm the bike is in a stable position, the drive wheel cannot unexpectedly contact anyone, and loose clothing is away from the chain. Check power switch, key, battery installation, charge indicator, brake levers, throttle position, and visible connectors.
Change only one thing at a time and record the result. If several connectors are unplugged and settings changed together, the original cause becomes harder to identify. Never bridge wires, bypass a fuse, defeat a brake cut-off, or connect an unapproved battery to “see what happens.”
If the display is completely dead
A dead display usually directs attention toward the battery, main power switch, key switch, fuse or breaker, battery connector, and main wiring. Start by checking whether the battery is charged using the approved indicator and charging procedure. Make sure a removable pack is fully seated and locked. Some connectors appear joined but are not pushed to their designed position.
Inspect only what the manual makes user-accessible. Look for looseness, dirt, water, bent pins, discoloration, or damaged insulation without touching exposed metal. If a fuse is accessible and the manual permits inspection, use only the specified replacement. A fuse that blows again indicates a fault; repeatedly replacing it can create heat and further damage.
Confirm the battery was charged correctly
Use the original or manufacturer-approved charger with the correct voltage, connector, and polarity. A connector that physically fits is not proof that a charger is compatible. Plugging an incorrect charger into a lithium battery can damage the pack or create a fire hazard.
Check the wall outlet with an ordinary safe device, then observe the charger indicator as described in the manual. Allow a cold battery to warm to the permitted charging range and a hot battery to cool before charging. The battery charging, storage and lifespan guide explains routines that reduce avoidable charging problems.
If the bike powers on but will not move
This symptom often involves a safety interlock or control state rather than a completely empty battery. Make sure the throttle is fully closed before startup. Release both brake levers. Many electric bikes cut motor power while a brake switch is active, so a lever that is held, damaged, or not returning can prevent drive.
Confirm the selected mode permits riding and that any kickstand, key, lock, app, remote, or parent-control feature is in the required position. Check whether an error code appears. Do not bypass the interlock. Its purpose is to prevent unintended movement or continued power during braking.
Check brake-lever return
With the bike powered off, move each brake lever gently and confirm that it returns to its resting position. Look for a bent lever, trapped cable, misaligned guard, mud, or crash damage. A lever can appear released while the electrical brake switch remains active.
If a brake switch or cable needs adjustment beyond the user procedures in the manual, contact support or a qualified technician. Riding after defeating a brake cut-off can produce unexpected motor response and should never be treated as a temporary solution.
Check throttle position and movement
The throttle should return smoothly to closed when released. Dirt, a displaced grip, crash damage, overtightened hardware, or a pinched wire can interfere with movement. Inspect externally with power off. Do not lubricate electrical throttle parts unless the manufacturer specifically instructs it.
A controller may refuse to start if it detects throttle input during power-up. Turn the bike off, allow the throttle to close completely, release the brakes, and restart using the prescribed sequence. For rider training, review how to teach kids throttle control.
Look for a visible connector problem
Transportation, vibration, assembly, or a fall can loosen an accessible connector. Follow the wiring path visually without pulling on wires. A properly joined connector should match its keyed orientation and locking method. Never force two connectors together or twist pins to make them fit.
If water, corrosion, melted plastic, exposed copper, or damaged pins are visible, stop. Photograph the area and contact support. Disconnecting a high-current battery connector can spark if performed incorrectly, so follow the manual rather than treating every plug as a household connector.
If the motor makes a sound but the wheel does not drive
Power off immediately and inspect the mechanical drive. A loose or derailed chain, damaged sprocket, jammed wheel, severe brake drag, or foreign object can stop movement. Do not run the motor repeatedly against a jam because current and heat can rise quickly.
Keep fingers away from the chain and sprockets. Rotate parts only as permitted with the battery isolated according to the manual. For normal inspection intervals, use the maintenance checklist by riding hours. A damaged chain, sprocket, wheel, or brake should be repaired before riding.
If the bike cuts out while riding
Note whether the cut-out occurred on a hill, in deep grass, mud, sand, high mode, low battery, or hot weather. Heavy load can cause voltage sag, heat protection, or current protection. A loose connection can also open when the bike vibrates. Do not immediately send the child back onto the same hill to reproduce it.
Move the bike to a safe location, power it off, and let hot components cool as directed. Check battery state, packed mud, tire pressure, brake drag, chain movement, and external connections. The guide on terrain, range and control explains why soft surfaces and climbing increase electrical load.
Do not mistake normal voltage sag for a full battery
A battery indicator can drop during acceleration or climbing and recover after the load is removed. That rebound does not restore the energy already used. Repeated deep sag, early cut-outs, or rapidly decreasing riding time should be documented and discussed with support.
Compare sessions using the same rider, route, tire pressure, speed mode, and starting charge. If the bike works normally on flat firm ground but cuts out only under heavy load, the information helps distinguish range conditions from an intermittent wiring or battery fault.
If the battery will not charge
Inspect the outlet, charger indicator, charge port, connector orientation, battery temperature, and approved charging sequence. Never charge a wet bike or battery. After washing or rain exposure, dry the machine fully and follow the manufacturer’s waiting instructions.
A charger that stays cold, shows an unexpected light, cycles on and off, or becomes unusually hot may need evaluation. Do not open the charger. Do not insert tools into the charge port. Stop using any cable with cuts, crushed insulation, loose pins, or heat discoloration.
Consider recent water or washing exposure
Water resistance does not mean every electrical component can be submerged or pressure-washed. Water can enter damaged seals, connectors, switches, or a charge port. If the no-start began after rain, mud, or cleaning, do not keep applying power in hopes that it will dry while energized.
Move the bike to a dry, ventilated area, switch it off, and follow the manual. Read whether kids can ride an electric dirt bike in rain or mud and the safe cleaning guide before the next wash.
Consider recent crash or transport damage
A fall can bend a brake lever, pinch a throttle cable, loosen a connector, damage a switch, or disturb the battery mount. Transport straps can also press controls or wiring. If the failure followed an impact, inspect the complete bike rather than focusing only on the battery.
Do not ride with a cracked battery case, bent frame, damaged fork, loose handlebar, distorted wheel, leaking component, or controls that no longer return normally. Photograph the damage before moving or adjusting parts so support can understand the original condition.
When a reset is appropriate
Use only the restart or reset procedure documented for the model. A normal reset may involve turning the bike off, releasing throttle and brakes, waiting a specified time, and powering on again. It should not involve shorting terminals, disconnecting random wires, or holding undocumented button combinations found in unrelated videos.
If a warning returns after the approved reset, the bike is reporting an unresolved condition. Record the code and stop. Clearing a warning without correcting its cause is not a repair.
Information to send customer support
- Bike model, order information, and approximate purchase date.
- Battery and charger labels photographed clearly without posting them publicly.
- Exact symptom and whether the display powers on.
- Error code, indicator colors, sounds, smells, or unusual heat.
- Battery state, charging sequence, and charger behavior.
- Terrain, speed mode, rider load, temperature, and recent riding time.
- Recent fall, washing, rain, storage, assembly, or transportation.
- Photos or a safe video of accessible connectors and visible damage.
Clear evidence usually leads to faster support than replacing parts by guesswork. Never send passwords, payment information, or unrelated personal data.
How this applies to the Ecoleap K2
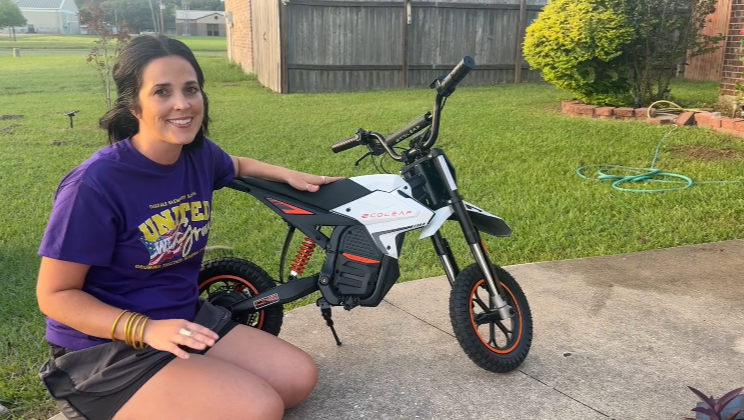
For the Ecoleap K2 kids electric dirt bike, confirm the battery is charged and correctly connected, the power sequence is followed, the throttle is closed, and the brake levers return normally. Check the selected speed mode and inspect for visible crash, water, connector, chain, or brake problems.
If the K2 remains dead, shows an error, cuts out repeatedly, or has heat, odor, battery-case, wiring, or connector damage, stop using it and contact Ecoleap support with the information above. Do not bypass safety systems or substitute an unapproved battery, controller, fuse, or charger.
Frequently asked questions
Can I test the bike with another charger?
Only if it is specifically approved for that exact battery and model. Matching connector shape is not enough.
Why does the bike not move when a brake is pressed?
Many models intentionally cut motor power during braking. A lever or switch that does not release can keep the cut-off active.
Should I open the battery to check a fuse?
No. Lithium battery packs contain hazardous energy and are not a parent-serviceable component unless the manufacturer explicitly provides a procedure for a separate accessible fuse.
Can I keep riding after an intermittent cut-out?
No. An intermittent loss of power can recur in a hazardous location and may indicate heat, battery, connection, controller, or wiring trouble.
Final takeaway
A no-start problem should be diagnosed by symptom and in a safe order. Check charge, power sequence, battery seating, brake release, throttle return, visible connectors, and mechanical freedom before assuming a major component has failed. Stop when you find heat, odor, swelling, water intrusion, repeated fuse failure, exposed wiring, impact damage, or an unresolved warning. Careful documentation protects the child, prevents unnecessary parts replacement, and gives qualified support the information needed to solve the real problem.


Share:
What to Inspect After a Child Crashes a Dirt Bike
How Much Does a Kids’ Electric Dirt Bike Really Cost to Own?