

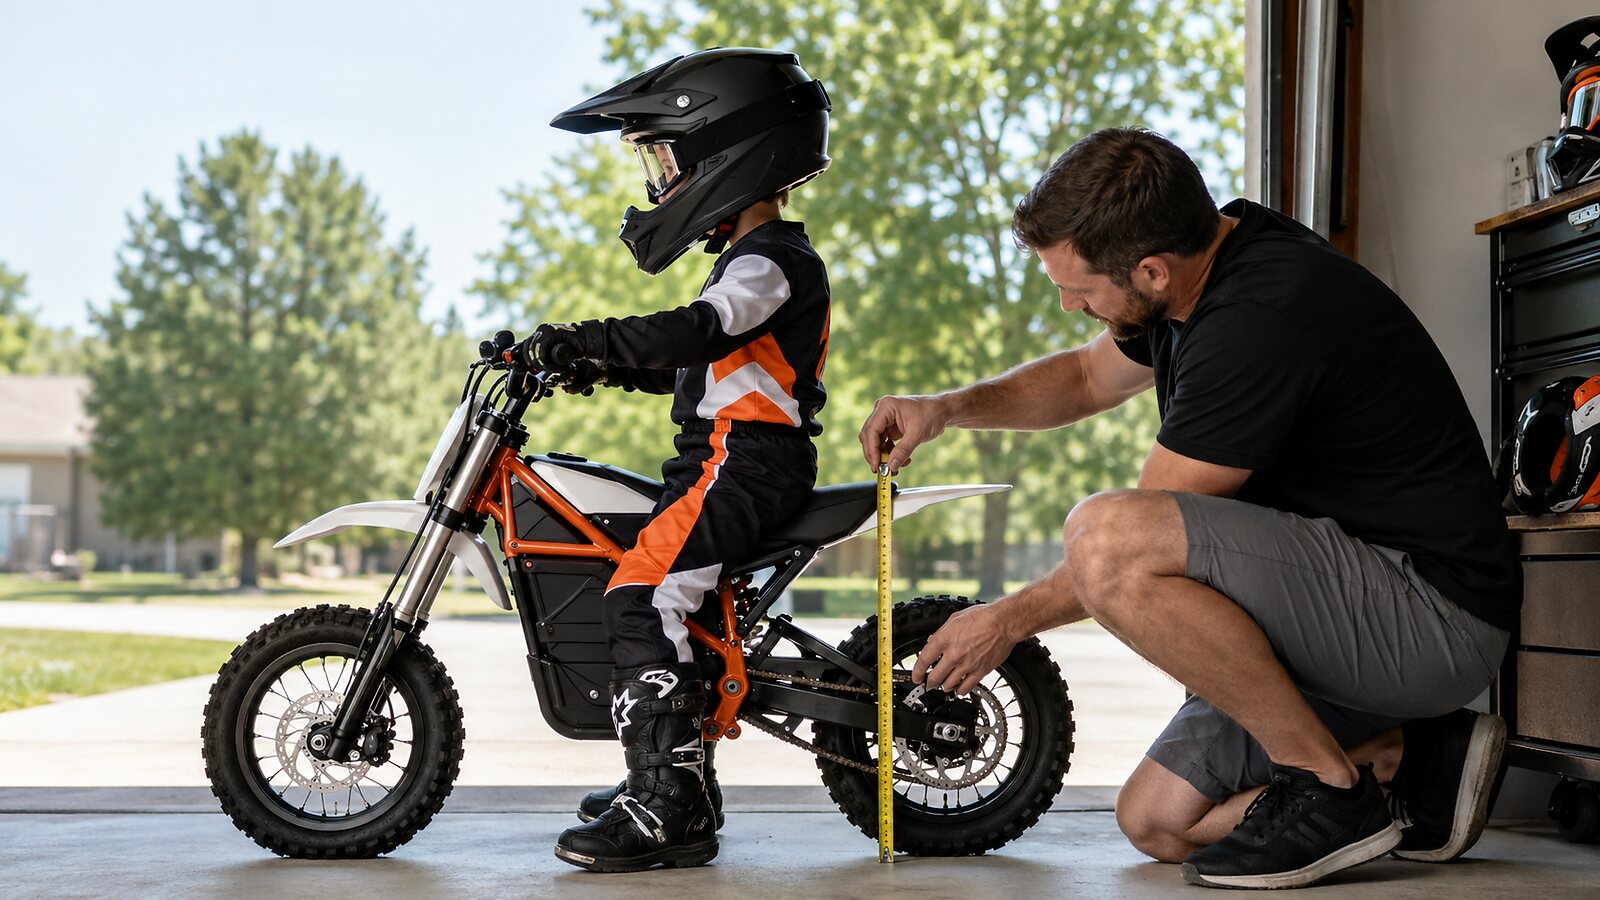
Choosing a kids’ dirt bike by height starts with a tape measure, but it should never end with a height chart. Total height is useful for narrowing the field; the final decision must also account for inseam, seat width, handlebar reach, brake access, bike weight and the child’s ability to control the machine when it begins to lean.
Quick answer: Measure your child in the boots they will ride in, compare their inseam with the bike’s seat height, and then perform a real fit test. A suitable rider should be able to reach the controls without stretching, place both feet down securely, hold the bike upright, turn the bars fully and stop the bike without an adult supporting it.
Do not buy a larger bike simply to leave room for growth. A speed limiter can reduce acceleration, but it cannot make a tall, wide or heavy chassis easier for a small child to balance.

Why height alone cannot choose the right dirt bike
Two children who are both 48 inches tall may not fit the same bike. One may have long legs and a short torso; the other may have a longer torso, shorter legs and smaller hands. They can reach the same seat very differently. Riding experience matters too: a confident bicycle rider may manage a slightly taller chassis, while a first-time rider benefits from more secure ground contact.
Motorcycle dimensions can also be deceptive. Published seat height is normally measured with the bike unloaded. When the child sits down, suspension sag may lower the bike. A wide seat spreads the legs and can make a nominally low seat feel taller. Thick-soled riding boots may add reach, but they can also reduce ankle flexibility. That is why a specification table cannot replace a seated test.
Weight may matter even more than seat height. The Yamaha PW50 is a useful example: its official seat height is only 18.7 inches, yet its wet weight is approximately 90 pounds. A child may touch the ground easily and still be unable to stop the motorcycle from falling once it leans. By comparison, a powered balance bike can have a similar seat-height range while weighing less than one quarter as much.
Step 1: Measure height and inseam correctly
Measure total height
Have the child stand against a wall without a helmet, looking straight ahead. Keep the heels flat and mark the top of the head. Total height helps identify the general size category, but do not use it as the only number.
Measure riding inseam
Inseam is the more useful measurement for ground reach. Ask the child to wear the pants and boots they will use while riding. Have them stand naturally with their feet a few inches apart. Hold a thin hardcover book gently upward between the legs to simulate the top of a narrow saddle, then measure from the floor to the top edge of the book.
Record the result in inches and centimeters. Repeat the measurement once. Children move, footwear compresses and a one-inch error can change the fit recommendation at the boundary between two sizes.
Do not treat inseam and seat height as the same number
A child with a 20-inch inseam does not automatically need a bike with a 20-inch seat. Seat width, chassis width and suspension sag change effective reach. On a narrow balance-bike saddle, the legs can drop almost straight down. On a wider dirt-bike seat, the legs angle outward before reaching the ground.
Step 2: Decide how much foot contact the rider needs
The ideal amount of ground contact depends on the bike and the rider’s experience.
- First-time powered riders: both feet should contact the ground securely, preferably with the balls of both feet and enough knee bend to catch a slow lean.
- Developing riders: the balls of both feet may be sufficient if the bike is light and the child can stop and start consistently.
- Experienced riders: some can control a taller bike with one foot down, but that technique should not be used to justify an oversized first bike.
Toe tips barely touching is not a successful fit test for a beginner. The child should not need to slide far to one side of the seat at every stop. If the rider is thinking about reaching the ground, less attention remains for braking, steering and looking ahead.
Step 3: Perform the five-part fit test
Whenever possible, test the actual bike with the power switched off. The child should wear riding boots because footwear changes both reach and control feel.
1. Ground-contact test
Seat the child in a neutral position, not pushed forward onto the fuel cap area or rear fender. Check whether both feet reach securely and whether the knees retain a small bend. Gently lean the bike a few degrees to each side while an adult remains ready to catch it. The rider should respond by placing weight through the nearer foot rather than freezing or grabbing the throttle.
2. Handlebar-reach test
With both hands on the grips, the elbows should remain slightly bent. Ask the child to turn the bars fully left and right. The torso should not have to leave the seat, the outside arm should not lock straight and the knees should not collide with the handlebar.
3. Brake and throttle test
Small hands can be the limiting factor even for a tall child. The rider should pull the brake lever with useful force while keeping the other fingers around the grip. If the lever has reach adjustment, set it according to the manual. The throttle should return freely when released, and the child should be able to close it without changing hand position.
4. Bike-weight test
Ask the child to hold the bike upright, walk it several feet, turn it around and deploy the kickstand if fitted. They do not need to lift a heavy motorcycle from flat on the ground alone, but they should manage normal parking and a small lean without being immediately overwhelmed.
5. Riding-position test
The child should be able to place both feet on the pegs, stand briefly with knees and elbows bent, sit again and look ahead. A cramped rider may hit the bars with their knees. An overstretched rider may hang from the handlebar and struggle to steer precisely.
| Fit signal | Good sign | Warning sign |
|---|---|---|
| Feet | Secure contact with controlled knee bend | Only toe tips reach or rider slides far off-center |
| Arms | Elbows stay bent through full steering range | Arms lock or torso follows the handlebar |
| Hands | Brake can be applied firmly without losing the grip | Fingers barely reach or wrist rotates unintentionally |
| Bike mass | Child can steady, walk and turn the bike | A small lean immediately pulls the bike down |
| Body position | Can sit and stand without crowding or stretching | Knees hit the bar or rider hangs from the grips |
How common kids’ bike categories fit
The examples below show why product category matters as much as the height number. Always verify the current product page and manual for the exact model year.
Small powered balance bikes
Powered balance bikes are usually the easiest platform for small or inexperienced riders because they are narrow and light. STACYC currently lists the 12eDRIVE for a 16–19-inch inseam, with a 15-inch seat height and a 17-pound bike weight. Its 16eDRIVE moves to an 18–22-inch inseam, a 17-inch seat and approximately 19 pounds. The overlap is intentional: experience and control determine whether the larger model is useful.
These bikes let a child begin in non-powered mode and use their feet as outriggers. That makes them different from a heavier dirt-bike-style chassis even if the seat numbers look similar.
Compact electric dirt bikes
A compact electric dirt bike adds foot pegs, a twist throttle, heavier construction and more speed. The Ecoleap K2, for example, currently recommends a rider height of 44–52 inches and lists a 20.67-inch seat height. It weighs 41.9 pounds and offers 10, 15 and 20 mph settings. A child near the lower end of the height range should remain in the lowest mode until braking, turning and stopping are consistent.
The Ecoleap K1 and Ecoleap K2 serve overlapping young-rider needs, but K2 is the more capable progression platform. Do not decide between them only by asking which one has more power. The smaller or less experienced child should receive the bike they can physically control today.
Razor Dirt Rocket models
Razor commonly publishes age and maximum rider weight rather than a precise rider-height range. The current MX125 is the smallest Dirt Rocket and uses 12-inch pneumatic wheels; the MX350 also uses 12-inch wheels but is a larger, approximately 48.3-pound platform. Because the published guidance does not fully describe leg and arm reach, an in-person fit test is especially important.
Moving from an MX125 to an MX350—or from an MX350 to K2—should be based on demonstrated control, not birthday alone. Read our Razor MX125 vs. MX350 guide for the performance and ownership differences.
PW50 and small motorcycle-style bikes
The Yamaha PW50’s 18.7-inch seat is lower than the K2’s listed seat height, yet the PW50 weighs about 90 pounds ready to ride. It also introduces gasoline, heat and different starting and stopping routines. This is the clearest reason not to rank bikes by seat height alone. A child who fits the PW50 dimensionally may still benefit from more time on a lighter electric platform.
The KTM SX-E 2 provides another example of adjustable fit: its seat can be set at approximately 18.5 or 19.6 inches. Adjustment can extend the useful ownership window, but it does not remove the need to evaluate controls, bike mass and skill.
Wheel size, bike weight and power change the meaning of “fits”
Wheel size
Larger wheels roll over holes and roots more easily, but they also raise the chassis and increase rotational mass. A 12-inch wheel label does not guarantee identical fit because tire profile, suspension, frame shape and seat location vary between brands.
Bike weight
At normal riding speed, a heavier bike may feel stable. During mounting, parking, low-speed turns or a mistake, that same weight becomes a control problem. For young riders, the ability to recover from a five-degree lean is often more important than the maximum load rating.
Power and speed modes
A low-speed mode helps a properly fitted rider learn. It does not correct an oversized bike. If the child cannot reach the brake, turn the bars or support the chassis, limiting the motor to 5 or 10 mph does not solve the underlying problem.
What to do when your child is between sizes
When two models overlap, choose the one that produces better control during the five-part test. The larger bike may be reasonable only if the child can securely reach the ground and controls, manage the extra weight, and already demonstrates calm two-wheel skills.
If the smaller model is already cramped—knees hit the bar, the rider cannot stand naturally or the suspension is overloaded—move up only after confirming the next model physically fits. If neither bike passes, wait. A few months of growth and bicycle practice is cheaper than trying to correct fear or unsafe habits on an oversized machine.
Common sizing mistakes
- Buying by age: children of the same age can differ greatly in height, inseam, strength and judgment.
- Buying to grow into: the first months of poor control are when the rider most needs a forgiving fit.
- Looking only at maximum rider weight: a high load rating does not mean the cockpit suits a small child.
- Lowering tire pressure to reduce height: incorrect pressure changes steering, traction and tire safety. Use the manufacturer’s specification.
- Testing in ordinary sneakers: riding boots change reach and ankle movement.
- Ignoring hand size: a child may reach the ground but still be unable to apply the brake properly.
- Assuming training wheels fix fit: they can mask balance problems and do not improve handlebar or brake reach.
A practical parent checklist before buying
- Measure total height and inseam twice in riding footwear.
- Compare the numbers with the current manufacturer fit guidance.
- Confirm the child’s weight is below the stated limit.
- Perform ground-contact, handlebar, brake, bike-weight and riding-position tests.
- Choose the lowest appropriate speed mode for the first sessions.
- Use a properly fitted full-face helmet, eye protection, gloves, long sleeves, long pants, knee and elbow protection, and over-the-ankle footwear.
- Ride only in a legal, flat, open off-road area under direct adult supervision.
Frequently asked questions
Should a child be able to put both feet flat on the ground?
Not every experienced rider needs flat-foot contact, but a first-time powered rider should have secure contact with both feet and enough leverage to catch a small lean. Toe tips alone are not a good beginner fit.
Is inseam more important than total height?
Inseam is more useful for estimating ground reach, while total height helps estimate the overall cockpit size. Both are incomplete without checking arm reach, hand size and bike weight.
Can suspension sag make a tall bike fit?
Sag may lower the loaded seat, but it should not be used to force an unsuitable fit. Suspension must be set according to the manufacturer’s instructions, and excessive sag can harm handling.
How much room for growth is reasonable?
A small amount of growth room is acceptable when the child already passes every control test. If the rider can barely touch, cannot turn fully or needs an adult to hold the bike, the growth allowance is too large.
Why can a lower-seat bike be harder to ride?
Seat height is only one dimension. The lower bike may be much heavier, wider, faster or harder to brake. The 18.7-inch, approximately 90-pound PW50 demonstrates this clearly.
What if I cannot test the bike before ordering?
Compare the manufacturer’s seat height, recommended rider height or inseam, bike weight, wheel size and overall dimensions. Measure a similar setup at home, review the return policy and avoid choosing a borderline-large model without a physical test.
Bottom line
The right kids’ dirt bike is not the largest model a child can touch with their toes. It is the bike they can hold upright, steer through the full range, brake with confidence and manage without an adult supporting the chassis.
Use height to create a shortlist, inseam to estimate ground reach and the five-part fit test to make the final decision. For a younger or first-time rider, a smaller and lighter platform usually builds skill faster. For a developing rider who already controls two wheels reliably, a model such as the K2 can add suspension, three-stage speed progression and more room to grow—provided the child fits its 44–52-inch guidance and can manage its 41.9-pound weight.
For more help, read our Kids Dirt Bike Height Chart, Kids Dirt Bike Age Guide and PW50 readiness guide.
Safety note: Manufacturer age, height and inseam ranges are starting points, not guarantees of readiness. Specifications can change by model year and market. Verify the current product page and owner’s manual, use appropriate protective gear, supervise directly and ride only on private property or permitted off-road areas.


Share:
How Much Does a Yamaha PW50 Really Cost? A Parent’s Ownership Guide
When Should Kids Start Riding Dirt Bikes?